

So you’ve made up your mind. You’re convinced. You are going to build a charcuterie board with a WOW factor and it is going to be show-stopping, one of a kind, amazing and brilliant. That’s great! First, though, let’s go over the basics of charcuterie assembling. There are three main factors to consider when constructing your board; variety, contrast, and texture.
Variety
The first thing to consider when planning your board is how many different types of food you will have. Don’t just choose one or two of each food type, be diverse! Variety is the best way to ensure there really is something for everyone.
Contrast
A board with only similar flavors and foods is verging on boring, so make sure to balance what your guests will be tasting! Have both sweet and savory, tangy and salty, meats and cheeses, fresh and preserved, bread and spreads. The contrast of flavor, texture, and color is EVERYTHING.
Texture
Finally, make sure your board has the right textures for the perfect bite! Provide both soft and crunchy pieces of bread or crackers, chewy and smooth meats and cheese, and crisp and squishy fruits and nuts. This ensures an interesting and satisfying eating experience for your guests. It’s not just about the taste, it’s about the experience.
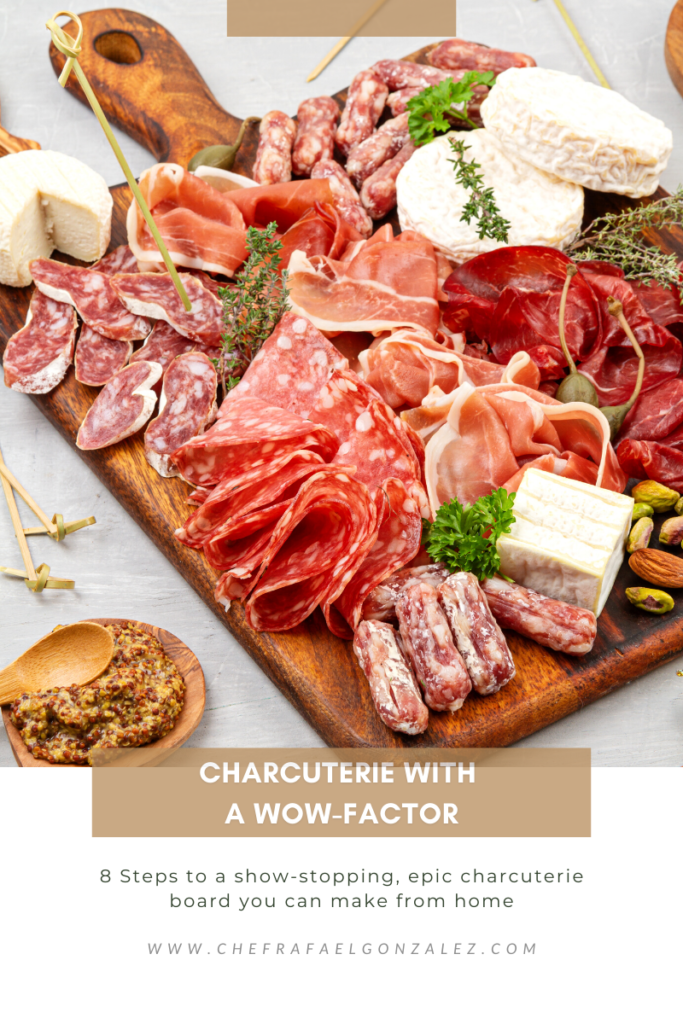
Your step-by-step guide for building a charcuterie board with WOW-factor
Now you know the basics, ready to get stuck into the details? Let’s go! Here’s your step-by-step guide for constructing your charcuterie board. You can also grab your FREE guide with your charcuterie board must-haves here.

Step 1: Get set up
The first step of building a charcuterie board is the actual board! When choosing what to serve your charcuterie on, think about what will provide the most visually appealing background for your creation. Shapes like circles, rectangles, and squares are ideal for producing a balanced look. Materials like slate, stone, and wood also work wonderfully. You can even use nice cutting boards or trays. As far as size goes; 4 to 6 people can use a 12-inch plate, while 8 to 12 people can use a 16-inch plate.
We used our 20 x 15″ cutting board by Teakhouse. Filling this up, you can feed a party of 15-20 guests, with just this board as the main event. You need not serve anything else.
I also recommend adding any small bowls or dishes that you will use for liquids, preserves, or condiments to the board ahead of time so you have an outline to work within when adding your meats, cheeses, and other products. You will also need cheese knives, small spoons, and any other cutlery necessary for serving up your scrumptiousness.
Step 2: Meat & cheese
The first foods to add to your board are meat and cheese, and it is not somewhere to hold back. The meat and cheese provide the anchor for your board, as well as being the largest quantity of food available. You want to ensure all your meat comes from a deli (not pre-packaged!) and that your cheeses come whole (not pre-sliced!). Aim for about 5 or 6 ounces of meat and cheese to really make sure your guests are satisfied.
Step 3: Balance your textures and flavors
When compiling your meats and cheeses, it is so important to balance flavors and textures. To start, choose meats that have been prepared in different ways- for example pated, cured, or smoked meat. Things like Crudo, prosciutto, serrano, Iberico or lomo pork tenderloin, bresaola cured beef tenderloin, cooked cotto, guanciale or mortadella are great examples of this. Some people choose to keep some meat unsliced for variety’s sake, but I recommend slicing all meats ahead of time to make it easier to use (as well as make your board tidier). That said, leave any pates and mousses whole to make spreading easier. When choosing meats from the deli, ask for samples. And when you find the one you want; ask them to slice it for you for a uniform result.
If you’re selecting cheese, choose a variety and try to include aged, soft, and hard cheeses. Experiment with the presentation of your cheeses- you can tear, wedge, slice, or leave them whole. Most soft cheeses are great for leaving whole, while harder cheeses are better for slicing beforehand.
When looking for somewhere to start in your quest for cheeses and meats (there are a lot to choose from) consider arranging by region, texture, or even type of animal product- like cow or goat cheese. Once you have done a few charcuterie boards, you will begin to have some favorites that become your go-tos- but don’t stop experimenting with a few new varieties with each board you make!
Step 4: Choose your accents
Just like accessories make the outfit, your garnishes and finishing touches make the board. Of course, there are practical additions- things like bread, crackers (this is a no-Ritz zone!!!), and baguettes to accompany your meats and cheeses.
Fill your pre-arranged bowls and dishes with liquid products like honey, jams, and mustard. This is a good time to add vegetables or antipasti. Once you have your main elements assembled- finish off with the garnishes. These are the foods that make the board complete, provide color accents and balance the flavors of the board. These can include nuts, fruit (guava, figs, and grapes are great additions), pickles, and dried fruit. For a complete guide of what should be included on your charcuterie board, click here. Choose only the freshest fruit, vegetables, and baked goods. Remember to fill your board completely, you want it to look abundant!! Over the top, robust, and mouth-watering is what you’re going for.
Step 5: Be creative
Once you know what you want to put on your platter, play around with the arrangement. What textures look good together, and what colors complement one another? Keep your desired aesthetic in mind when shopping for your board and look for products that have unusual patterns and gorgeous colors. Spend considerable time arranging and working on the details until you’re happy with the way your board looks. This is where you can really get creative, this is your work of art!
Step 6: Stay well stocked
It’s always a good idea to have backup produce in case your guests go through things faster than you anticipate! Having things like bread, jam, and olives on hand can come in handy and will keep your guests’ bellies full for longer.
Step 7: Know your stuff
Your board is going to look and taste amazing, so naturally, people are going to be intrigued by all the wonderful food on offer. Label your different foods( or keep the labels from the packaging so you can research them yourself). That way, when people ask you questions about your board, you’ll know the answers (and look really smart).
Step 8: Pair your beverages
Every charcuterie board needs a selection of well-paired drinks! Pair your board with beer (Saison, Porter, and Wild Ale are good choices) or wine such as a Pinot, Lambrusco, Prosecco, or even a dry Riesling are also great choices for matching your charcuterie.
For non-alcoholic options- go for fizz, but no soda. Sparkling water with lime or lemon is a great option to have on hand. Making sure your drinks complement your charcuterie can elevate your charcuterie experience even further!
Wrapping it up
All this info is just the tip of the charcuterie iceberg, really! As you continue to learn and experiment with the art form, you will find what flavors, colors, products, and textures work for you. And the best news is that you don’t have to learn all this on your own. I’m always here to help you with ideas, suggestions (especially for dietary restrictions and choices) to get this epic charcuterie board on your dining, coffee table or kitchen island.
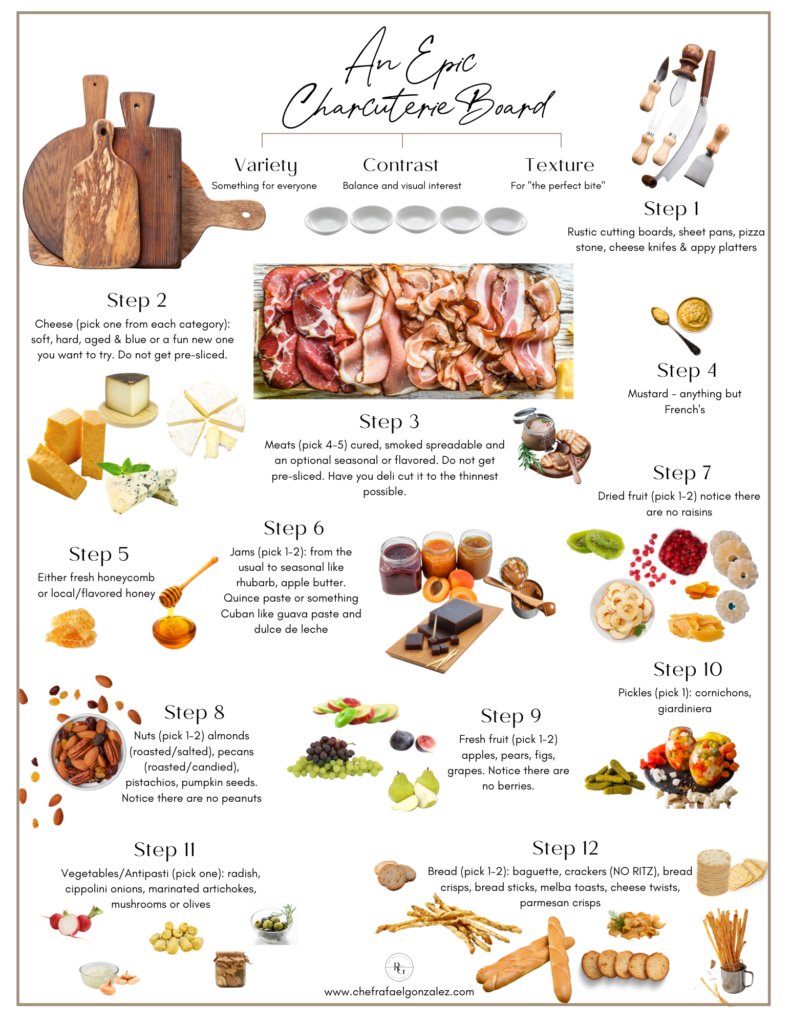
To see is to believe
For my visual peeps, I got you. Here’s a graphic…a infographic shopping list so you can hit your gourmet grocer with ease and have an overall view of all the things that come into play when prepping an extraordinary charcuterie board.
Let’s connect
Are we friends on social media yet? Come follow along for more kitchen tips and inspiration. You can find me on Instagram @chef.rafael.gonzalez and on Facebook, Chef Rafael Gonzalez.
If you tried these tips and feel free to tag me so I can see your culinary creation!
Want to learn more?
Did this post inspire you to build your own show-stopping charcuterie board? In this post we’ll talk about the benefits and why you should be DIY-ing your own board.


")


Be the first to comment